Transactional setup
To set up a transactional job you need to make sure that you have a project for this. So start with checking that you have a project for your transactional messages. If you don’t have any existing you can create a new. The project should either be of mixed or transactional type.
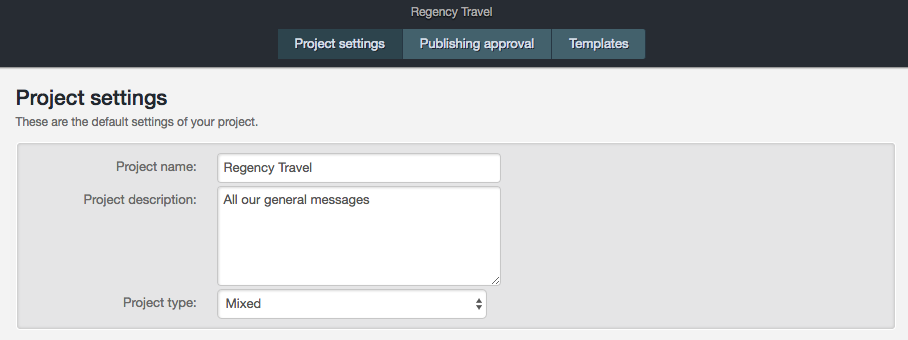
When you have made sure that you have a project suitable for your transactional job you select Transactional from the main menu. As you will see when you enter the transactional page there are two statuses available for a transactional job:
Inactive – the sendout needs to be activated before it can send any messages
Active – the sendout is activated and whenever it receives a trigger post a message will be sent.
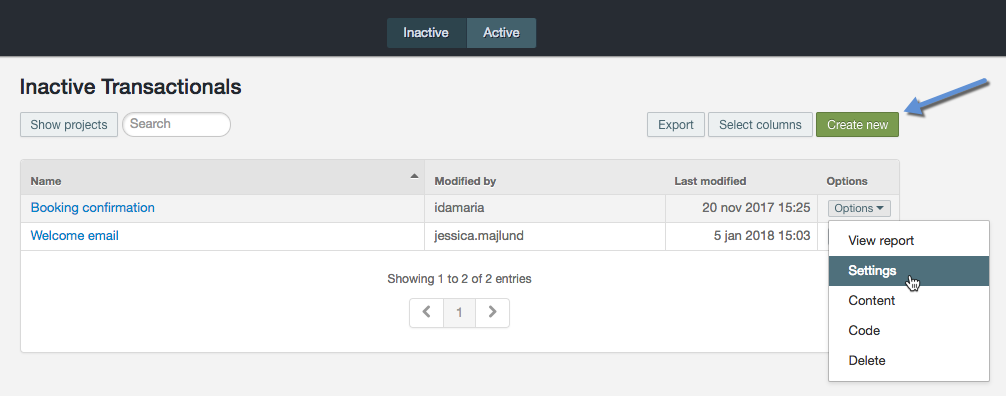
Hit the Create new button to open up the settings part and add the following settings to your transactional sendout:
- Name
- Channel
- Project
- Recipient list
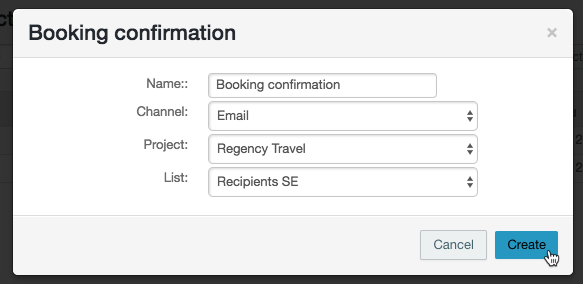
In this example we’re creating a transactional email, called Booking confirmation, saved in the project Regency Travel, and our recipients will be saved in our list Recipients SE.
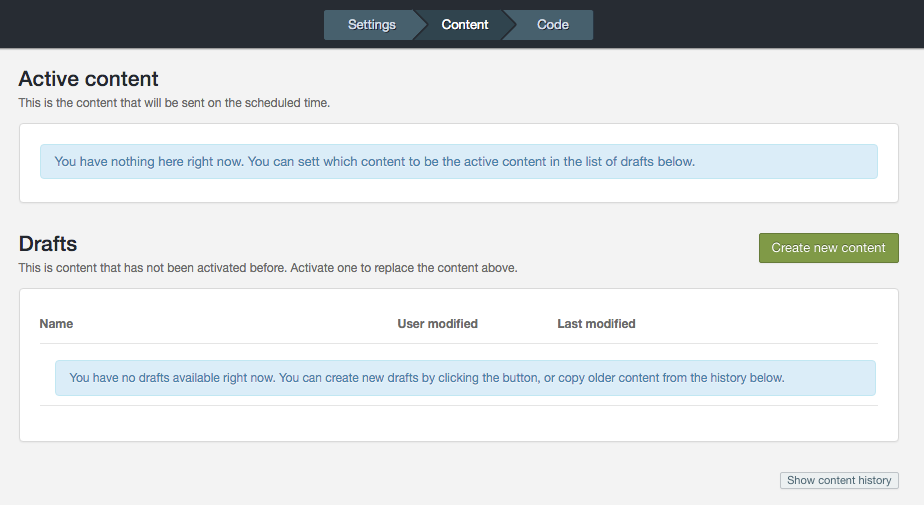
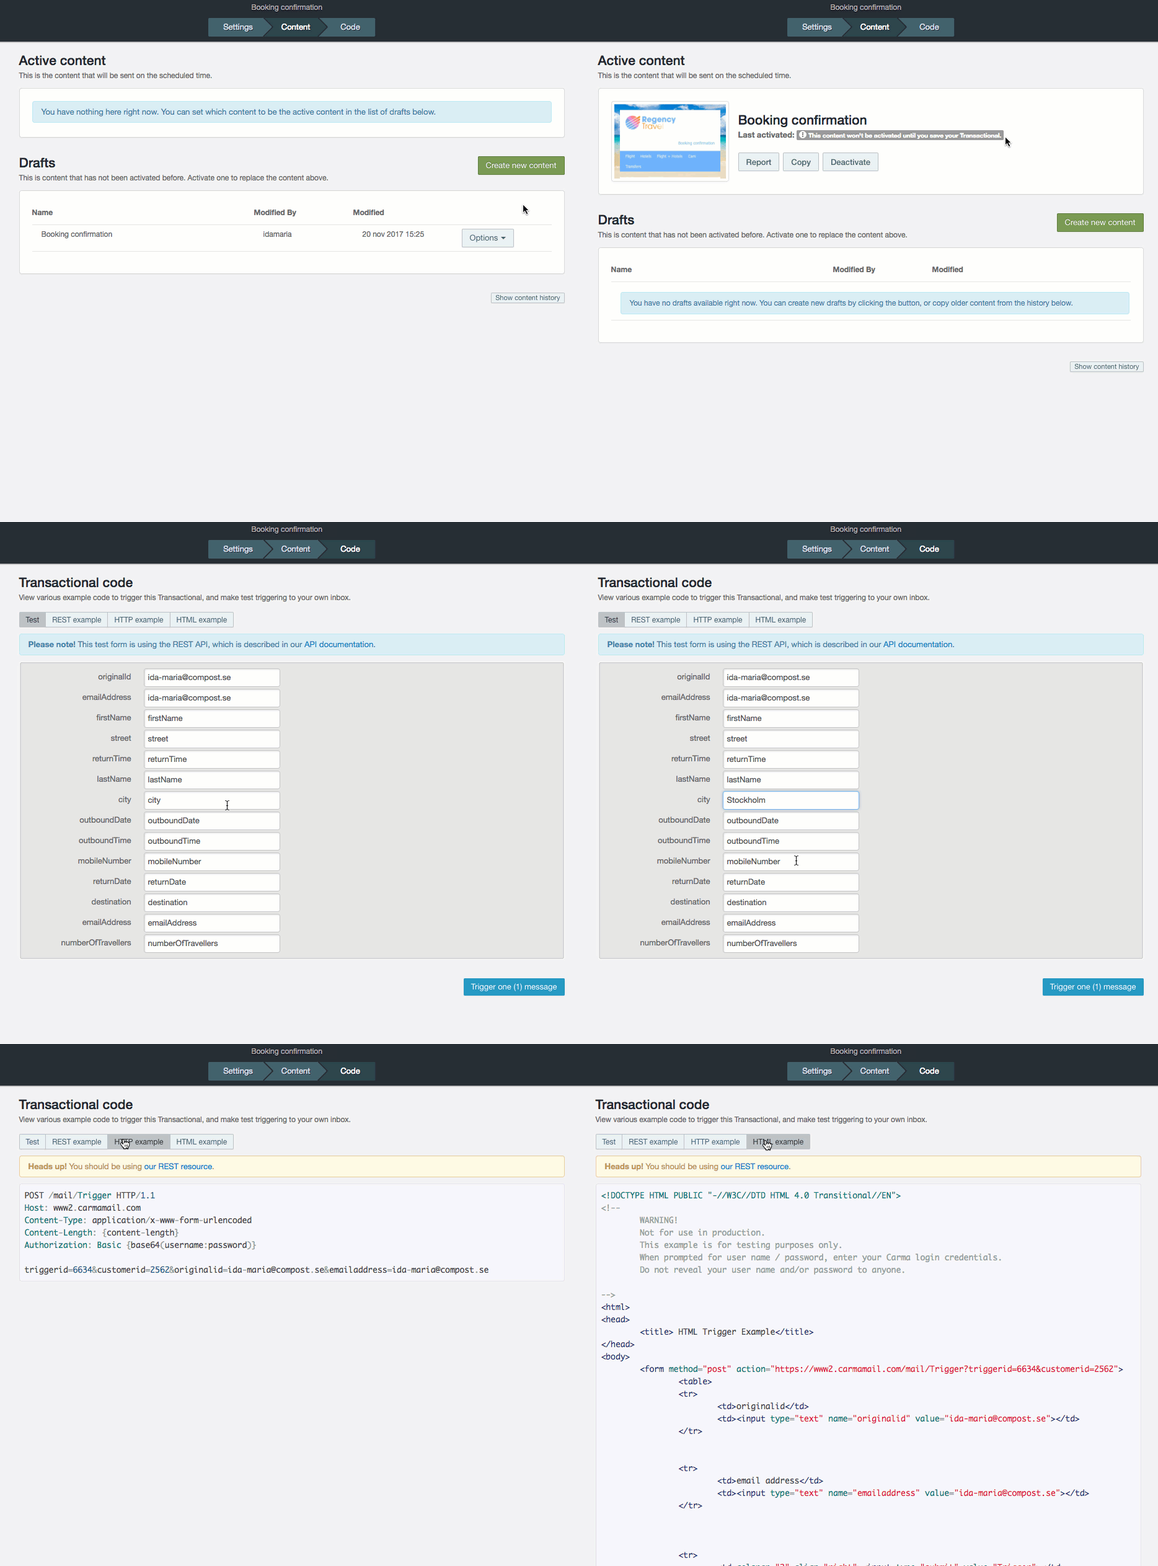
Then you have to create the message that should be tied to this Transactional job. This is referred to as a Content.
Transactionals are using content versions to handle new content. Read more about versions here.
Click on Create new content and select the template you want to use and then start edit your content and save and close it when you’re done.

If you want to start using your new message right away you click on Options > Activate for your version and then save the Transactional before your new content will be activated.
Finally you can check your transaction code and verify the setup by running a web service call or similar with the code.
You can trigger a test message to yourself and add data to your test recipients to match and test any content data, like {{contact.city}} in below example.
Watch the video!
