
Scheduled Jobs - Create a job
With Carma Scheduled Jobs you can make a selection of recipients in a system outside Carma and send a message to these recipients. The recipients will also be updated with, if any, new data.
If you want to learn more, please go to our API page.
Import setup in Carma
To get the job running you need to, in Carma, enter information about the email, when Carma should look for a new file and where the file is to be found.
PLEASE NOTE: The Email/Transactional must be created before you can complete your Scheduled job. Information about the different steps in a Email/Transactional setup is to be found here.
Creating Scheduled jobs
The job settings are found in Carma: Account settings > Scheduled jobs (> Create job > Send delivery/Send trigger).
You will then get an overview of all your current Schedule jobs. To create a new job click on the button “Create job”.
Enter the name you wish to give the specific job.
Schedule
In the dropdown you can choose what specific time you wish the job to run or if you wish the job to run in a specific interval. You can set a time slot (e.g. between 12.00-14.00 every day) or an interval (e.g. every 30 minutes):
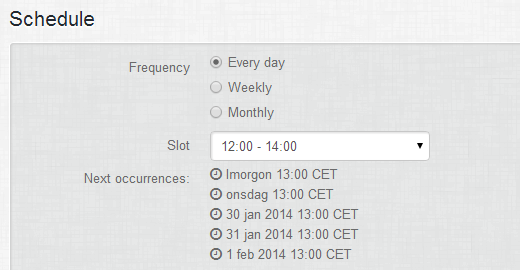
If you want Carma to search for a file on specific days you select the days you wish the Schedule job to run*. It is also possible to see the next five events by clicking the arrow by next runs.

*If no days are selected the schedule job will run every day.
PLEASE NOTE: Only one file will be processed each Scheduled job.
File settings – ONLY for Send trigger/Batch trigger
The last setting you need to enter is where Schedule job will find the file: path, username and password information to the FTP.
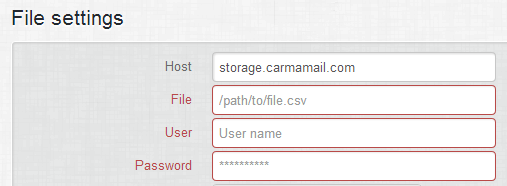
The filename should be a fixes name, for example welcomemailSE.csv. Enter the name and path in the field “Filename format”. If you save the file in the root of your FTP account you don’t need to type any path except the filename. If you save the file in a subfolder enter the exact path to the file: welcometrigger/welcomemailSE.csv.
Use the supplied login credentials to connect to the server and upload the file to the root of your home folder. Allowed characters for file names are “A–Z 0–9 – _”.
As soon as a Schedule job is started it will rename the file to filename.archive.timestamp (timestamp is when the job started), example welcomemailSE.csv.archive.[timestamp].
Check progress
To see if your Scheduled job process is successful you can click on Feedback.
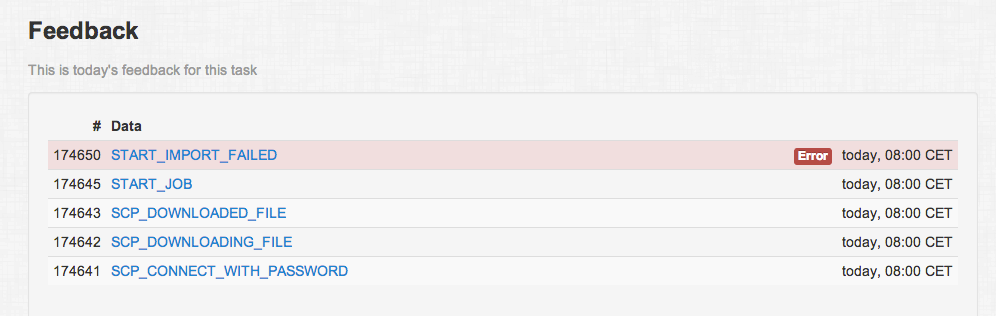
In Feedback it’s possible to follow the different steps and therefore see if your job runs successfully or if it’s failing, and if so, in which step the job failed.
File settings – ONLY for Send delivery/Send camapign
File upload
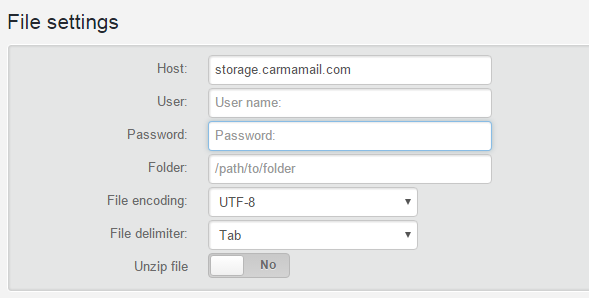
Use the supplied login credentials to connect to the server and upload the file to the suitable subfolder of your home folder. If there is a risk that a file is uploaded at the same time as the send campaign/batchtrigger run we recommend that you use a temporary filename or a separat upload folder to avoid that the job start before the file is completely uploaded. As soon as the file is completely uploaded to the FTP you then change the name or folder to ensure that the job will read the file.
Allowed characters for file names:
A–Z 0–9 – _
Naming convention: senddelivery_<deliveryid>_<ListID>_<Sendtime>.txt
DeliveryID = The ID that identifies as the specific mail that will be sent.
ListID = The ID that identifies the list the recipients will be imported to
Sendtime = the time set will schedule the sending (yyyyMMddhhmmss).
Example:
senddelivery_12345_2345_20130601143000.txt
(Delivery ID 12345 will be sent 2013-06-01 14:30.00 and the recipients in the file will be imported to list 2345.)
PLEASE NOTE: If you upload a file where date/time has passed, the campaign will be sent immediately.
As soon as a Schedule job is started it will rename the file to filename.archive.timestamp (timestamp is when the import started), example senddelivery_12345_2345_20130601143000.txt.archive.[timestamp].