
Attribute Tags
With attribute tags Carma can present individual recipient data in your send outs, for example you can say “Hey Anna!” instead of just “Hey!”.
Please note that attribute tags is an older method for placeholders, Carma also supports handlebar placeholders (like: {{contact.firstName}}) which enable you to work with your data on another level. Read more about it here.
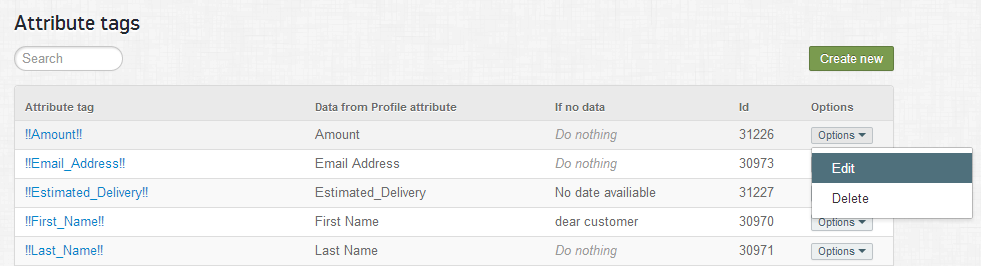
To create or edit an attribute tag you go to Menu > Account settings > Attribute tags. There you’ll find an overview of your existing attributes (some default tags are created in advance by Carma).
Choose if you want to create a new or edit an existing tag.
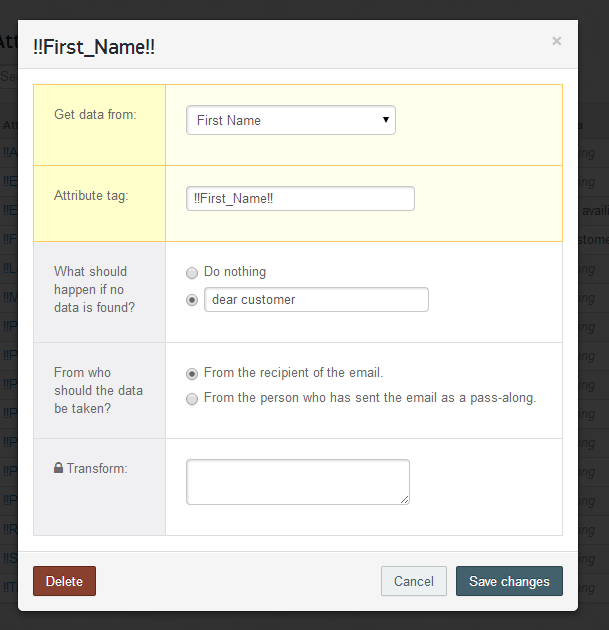
In the example below you can see that the attribute tag !!First_Name!! gets its value from the attribute “First Name” (all your existing attributes are shown in the dropdown).
The name of the tag (which you write in your send out) is !!First_Name!!.
If the selected attribute is missing a value on any recipient and you don’t want to leave it blank in the send out (the option “Do nothing”) you can type in a fallback text that will be shown instead. In the example the text “dear customer” will be shown if no data is imported on any recipient.
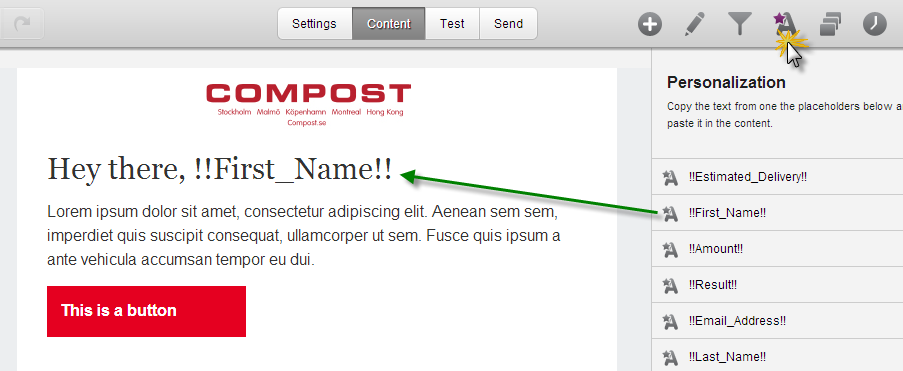
You will then find all your created attribute tags in the email editor. Click on the capital A in the editor to list all your attribute tags so you can copy and paste them into the email content:
Don’t forget to verify that your attribute tag is working correctly!
To successfully use attribute tags you should make sure that:
- The attribute tag is created and is connected to the attribute you want to use
- That you have data imported into the attribute that you have connected with your attribute tag
- That you have a test list with the data in the attribute that is connected to the attribute tag so you can verify with test email
- You can also schedule your send out a bit and check “examples” when the send out is under scheduled to verify the data connection